
These no bake peanut butter oat cups combine a chewy oat base with a thin layer of chocolate. The base uses rolled oats, creamy peanut butter, and honey, while a little extra peanut butter keeps the chocolate topping easier to spread.
The recipe makes about 12 standard muffin-size cups without protein powder, almond flour, coconut oil, an oven, or a food processor. Keep the cups chilled so the base stays compact and the chocolate remains firm.
Quick Answer
Mix creamy peanut butter and honey, stir in rolled oats, and press the mixture firmly into 12 lined muffin cups. Chill the bases, top them with semisweet chocolate melted with a tablespoon of peanut butter, then refrigerate again until firm. One finished oat cup equals one serving.
No Bake Peanut Butter Oat Cups at a Glance
| Recipe detail | Information |
|---|---|
| Recipe type | No-bake snack or dessert |
| Yield | About 12 standard muffin-size cups |
| Serving size | 1 oat cup |
| Pan | Standard 12-cup muffin pan |
| Prep time | About 15 minutes |
| Chill time | About 1 hour |
| Cooking required | No |
| Food processor required | No |
| Protein powder required | No |
| Main allergen | Peanuts |
| Storage | Refrigerator or freezer |
Why You’ll Like These Peanut Butter Oat Cups
- They use five familiar grocery ingredients.
- No baking or food processor is required.
- There is no almond flour, coconut oil, or protein powder.
- The same peanut butter is used in the base and chocolate topping.
- Each cup is already divided into an individual portion.
- The recipe includes fixes for crumbly, greasy, or soft oat bases.
How These Oat Cups Differ From Peanut Butter Oat Balls
Both recipes use oats, peanut butter, and honey, but their final formats are different. These oat cups are pressed into muffin liners and covered with a separate chocolate topping. The site’s peanut butter oat balls are rolled by hand, with mini chocolate chips mixed directly into the oat mixture.
| Feature | Peanut butter oat cups | Peanut butter oat balls |
|---|---|---|
| Shape | Pressed into muffin liners | Rolled by hand |
| Chocolate | Separate topping layer | Mini chips mixed into the base |
| Portion | 1 standard muffin-size cup | 2 small balls |
| Main technique | Compact, chill, and unmold | Mix, chill, and roll |
Ingredients You’ll Need
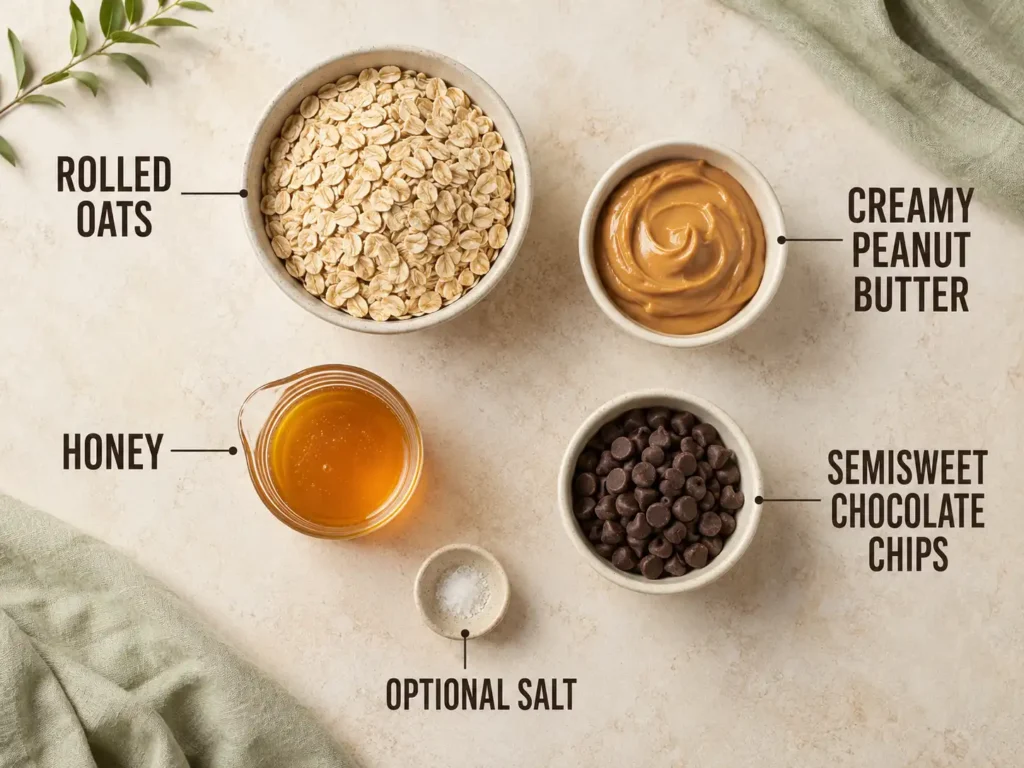
Old-Fashioned Rolled Oats
Use 1 1/2 cups, or approximately 120 grams, of old-fashioned rolled oats. They give the base structure while preserving a visible, slightly chewy oat texture.
Quick oats can absorb the wet ingredients more quickly and may create a softer or denser cup. The standard recipe is written for rolled oats.
For a cooked breakfast using the same pantry ingredient, see this high-protein baked oatmeal.
Creamy Peanut Butter
You need 3/4 cup, approximately 192 grams, for the oat base and another tablespoon, approximately 16 grams, for the chocolate topping.
Stir natural peanut butter thoroughly before measuring. A layer of separated oil can make the base greasy and difficult to compact. Very firm peanut butter should be allowed to soften at room temperature before mixing.
Honey
Use 1/3 cup, approximately 113 grams, of honey. It sweetens the cups while helping the peanut butter bind the oats.
Pure maple syrup can replace the honey, although the base may be slightly softer and the estimated nutrition will change.
Semisweet Chocolate Chips
Use 1/2 cup, approximately 85 grams, of semisweet chocolate chips. Melting them with one tablespoon of peanut butter creates a thinner topping without requiring coconut oil.
Check the product label if milk, soy, or another allergen is a concern. Different brands may also set more firmly or contain different amounts of sugar and fat.
Optional Salt
Add up to 1/4 teaspoon of fine salt when using unsalted peanut butter. Reduce or omit it when the peanut butter already tastes salty. The optional salt is excluded from the estimated nutrition.
Best Muffin Pan and Liners to Use
A standard 12-cup muffin pan produces the intended portion size. Individual silicone liners or a silicone muffin pan usually provide the easiest removal because the flexible sides can be peeled away from the chilled cups.
Paper muffin liners can also work. Chill the cups completely before peeling the paper away slowly. Avoid pressing the mixture directly into an unlined metal pan because the sticky oat base may be difficult to remove cleanly.
| Option | Advantages | What to consider |
|---|---|---|
| Silicone muffin pan | Flexible and easy to unmold | Place it on a firm tray before filling |
| Individual silicone liners | Easy removal and reusable | Still require a muffin pan for support |
| Paper liners | Widely available and inexpensive | May stick if the cups are not fully chilled |
| Unlined metal pan | No liners required | Not recommended without additional testing |
How to Make No Bake Peanut Butter Oat Cups
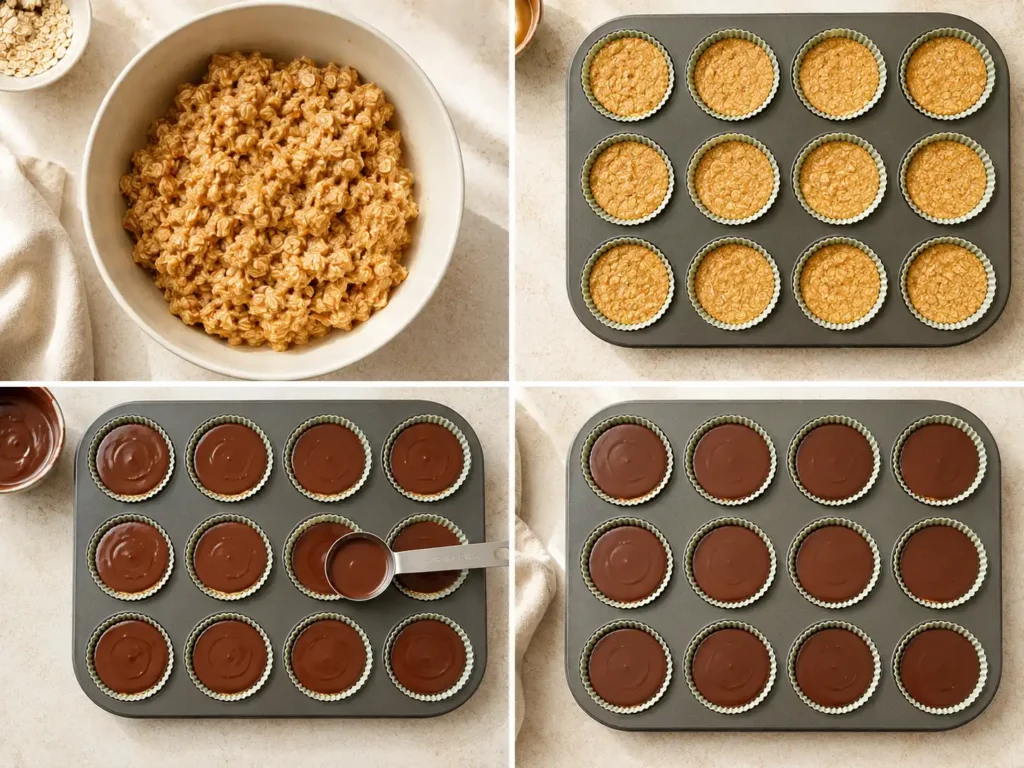
- Prepare the muffin pan. Line all 12 cavities of a standard muffin pan with silicone or paper liners.
- Combine the wet ingredients. Add 3/4 cup of creamy peanut butter and the honey to a medium mixing bowl. Stir until smooth and evenly combined.
- Add the oats. Stir in the rolled oats and optional salt until every oat is coated.
- Let the mixture rest. Leave the oat mixture for 5 minutes so the oats can begin absorbing moisture.
- Check the texture. Press a spoonful between your fingers. The mixture should hold together without crumbling or releasing visible oil.
- Divide the base. Distribute the oat mixture evenly among the 12 liners.
- Compact each cup. Press the mixture firmly into the bottom of each liner using the flat base of a small measuring cup or glass.
- Chill the bases. Refrigerate for 20 to 30 minutes, or until the surfaces feel firm.
- Prepare the topping. Place the semisweet chocolate chips and the remaining tablespoon of peanut butter in a microwave-safe bowl. Heat in 20-second intervals, stirring thoroughly after each interval, until smooth.
- Add the chocolate. Divide the melted chocolate evenly among the chilled oat bases and spread it into a thin layer.
- Chill until firm. Refrigerate for another 30 to 45 minutes, or until the chocolate and the sides of the cups feel firm.
- Unmold the cups. Peel the liners away gently and transfer the cups to an airtight container.
How to Tell When the Oat Base Is Right
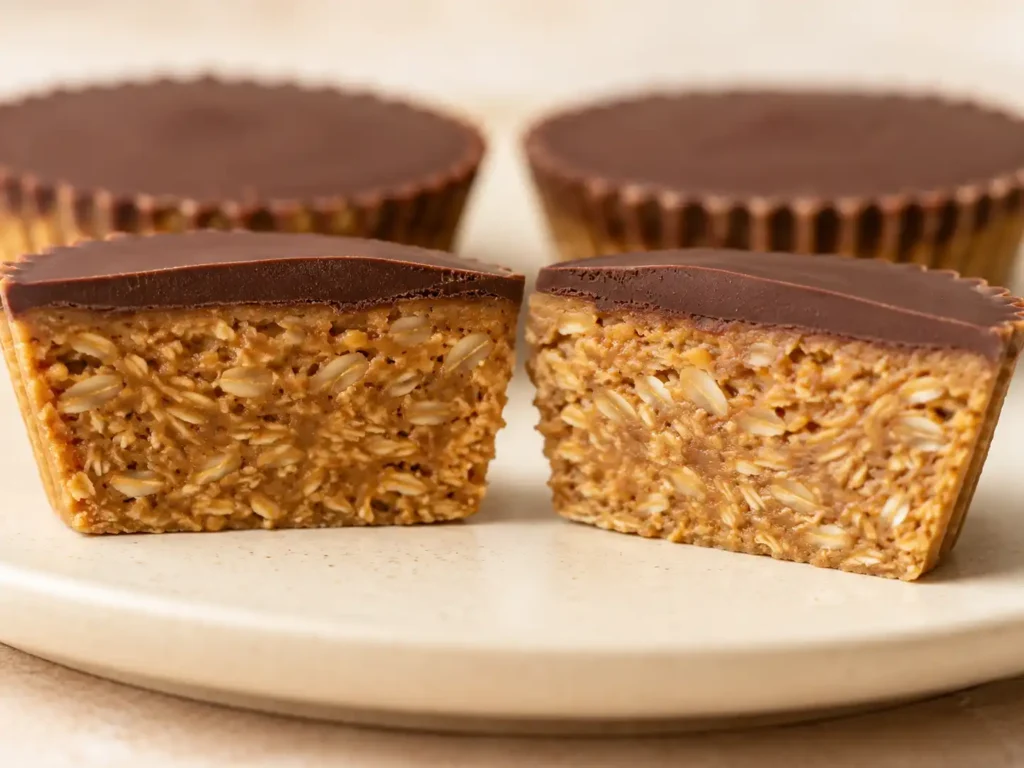
The base is ready to press into the muffin liners when it meets these visual and texture cues:
- It holds together when firmly pressed.
- No loose, dry oats remain at the bottom of the bowl.
- No visible oil is pooling around the mixture.
- The texture is thick enough to compact.
- It does not look wet, runny, or pourable.
Wait until after the five-minute rest before changing the ratio. The oats may absorb enough moisture during that time to correct a slightly soft mixture.
Troubleshooting Peanut Butter Oat Cups
| Problem | Likely cause | How to fix it |
|---|---|---|
| Base crumbles when pressed | Peanut butter is firm or there is not enough binder | Add peanut butter or honey 1 teaspoon at a time |
| Base looks greasy | Natural peanut butter was not fully stirred | Stir the jar thoroughly and chill the mixture before changing the ratio |
| Base remains too soft | Peanut butter is runny or the oats need more time | Rest and chill first, then add rolled oats 1 tablespoon at a time |
| Cups stick to the liners | They were unmolded before becoming firm | Chill longer and peel the liner away slowly |
| Chocolate cracks | The topping is too thick or extremely cold | Use a thinner layer and let the cup soften briefly before eating |
| Chocolate separates from the base | The oat layer was still soft when topped | Chill the base until firm before adding chocolate |
| Cups soften quickly | The peanut butter and chocolate have warmed | Return the cups to the refrigerator until firm |
Avoid adding milk or water as the first solution to a crumbly mixture. Extra liquid can make the cups softer and less stable during storage.
Budget-Friendly Ingredient Decisions
Why Almond Flour Is Not Required
The rolled oats provide enough bulk for this formula when the base is firmly compacted. Leaving out almond flour keeps the ingredient list shorter and avoids buying a separate specialty ingredient.
Why Coconut Oil Is Not Required
The tablespoon of peanut butter mixed into the chocolate helps create a spreadable topping. This allows the same peanut butter to be used in both layers instead of requiring another fat.
Use Ingredients in More Than One Recipe
Rolled oats, peanut butter, honey, and chocolate chips can all be used in breakfasts and other snacks. This cheap protein grocery list explains how to compare unit prices and choose groceries that fit several planned meals.
Variations and Substitutions
| Original ingredient or format | Possible variation | Expected change |
|---|---|---|
| Honey | Pure maple syrup | Softer base, different sweetness, and different nutrition |
| Rolled oats | Quick oats | Denser and more uniform texture |
| Creamy peanut butter | Smooth sunflower seed butter | Different flavor, consistency, and allergen considerations |
| Semisweet chocolate chips | Dark or milk chocolate chips | Different sweetness, firmness, and allergen profile |
| Standard muffin cups | Mini muffin cups | Smaller portions and a higher total yield |
Allergy and Gluten Notes
This recipe contains peanuts. Replacing peanut butter with seed butter changes the primary allergen, but it does not automatically make the recipe safe for every food allergy. Check every product label for allergen statements and possible cross-contact.
Only describe the cups as gluten-free when the oats and all packaged ingredients, including the chocolate chips and peanut butter, meet appropriate gluten-free labeling requirements.
Can You Add Protein Powder?
Protein powder is not part of this formula. Most powders absorb moisture, so adding a scoop without adjusting the peanut butter, honey, and oats can produce a dry or crumbly base.
A protein powder version needs its own tested quantities, yield, texture adjustments, and nutrition calculation. The standard recipe should not be described as high protein.
Portion Size and Estimated Nutrition
The listed ingredients weigh approximately 526 grams before the optional salt is added. Dividing the recipe into 12 equal cups produces portions weighing about 44 grams each.
For the most consistent portions, weigh the complete oat base and divide that weight by 12. Repeat the process with the melted chocolate topping before spreading it over the cups.
Estimated nutrition per serving. One serving equals one oat cup.
| Nutrient | Estimated amount per cup |
|---|---|
| Calories | About 204 |
| Protein | About 5.8 g |
| Carbohydrates | About 23 g |
| Fat | About 11.4 g |
| Fiber | About 2.5 g |
This estimate uses 120 grams of rolled oats, 208 grams of creamy peanut butter, 113 grams of honey, and 85 grams of semisweet chocolate chips, divided into 12 servings. Optional salt is excluded.
Actual values will vary with the peanut butter and chocolate brands, measuring accuracy, substitutions, and finished portion size. Use the labels from the products actually used when entering the final nutrition into WP Recipe Maker.
Meal Prep, Storage, and Freezing
- Store the cups in an airtight container after the chocolate has completely set.
- Keep the refrigerator at 40°F or below.
- Use refrigerated cups within about 7 days for the best texture and quality.
- Place parchment paper between layers if the chocolate surfaces touch.
- To freeze, arrange the cups in a single layer until firm before transferring them to a freezer-safe container.
- Use frozen cups within approximately 2 months for the best quality.
- Thaw overnight in the refrigerator or allow one cup to soften briefly before eating.
- No reheating is required.
The cups will soften as the peanut butter and chocolate warm. Return them to the refrigerator when they become too soft to handle comfortably.
Helpful Tools for This Recipe
No specialized appliance is required, but the following tools can make preparation and portioning easier:
- Standard 12-cup muffin pan
- Silicone muffin liners or paper liners
- Medium mixing bowl
- Sturdy spoon or silicone spatula
- Microwave-safe bowl
- Flat-bottom measuring cup
- Digital kitchen scale
- Airtight refrigerator container
- Freezer-safe container
Silicone liners are the most useful optional tool because their flexible sides make chilled oat cups easier to remove.
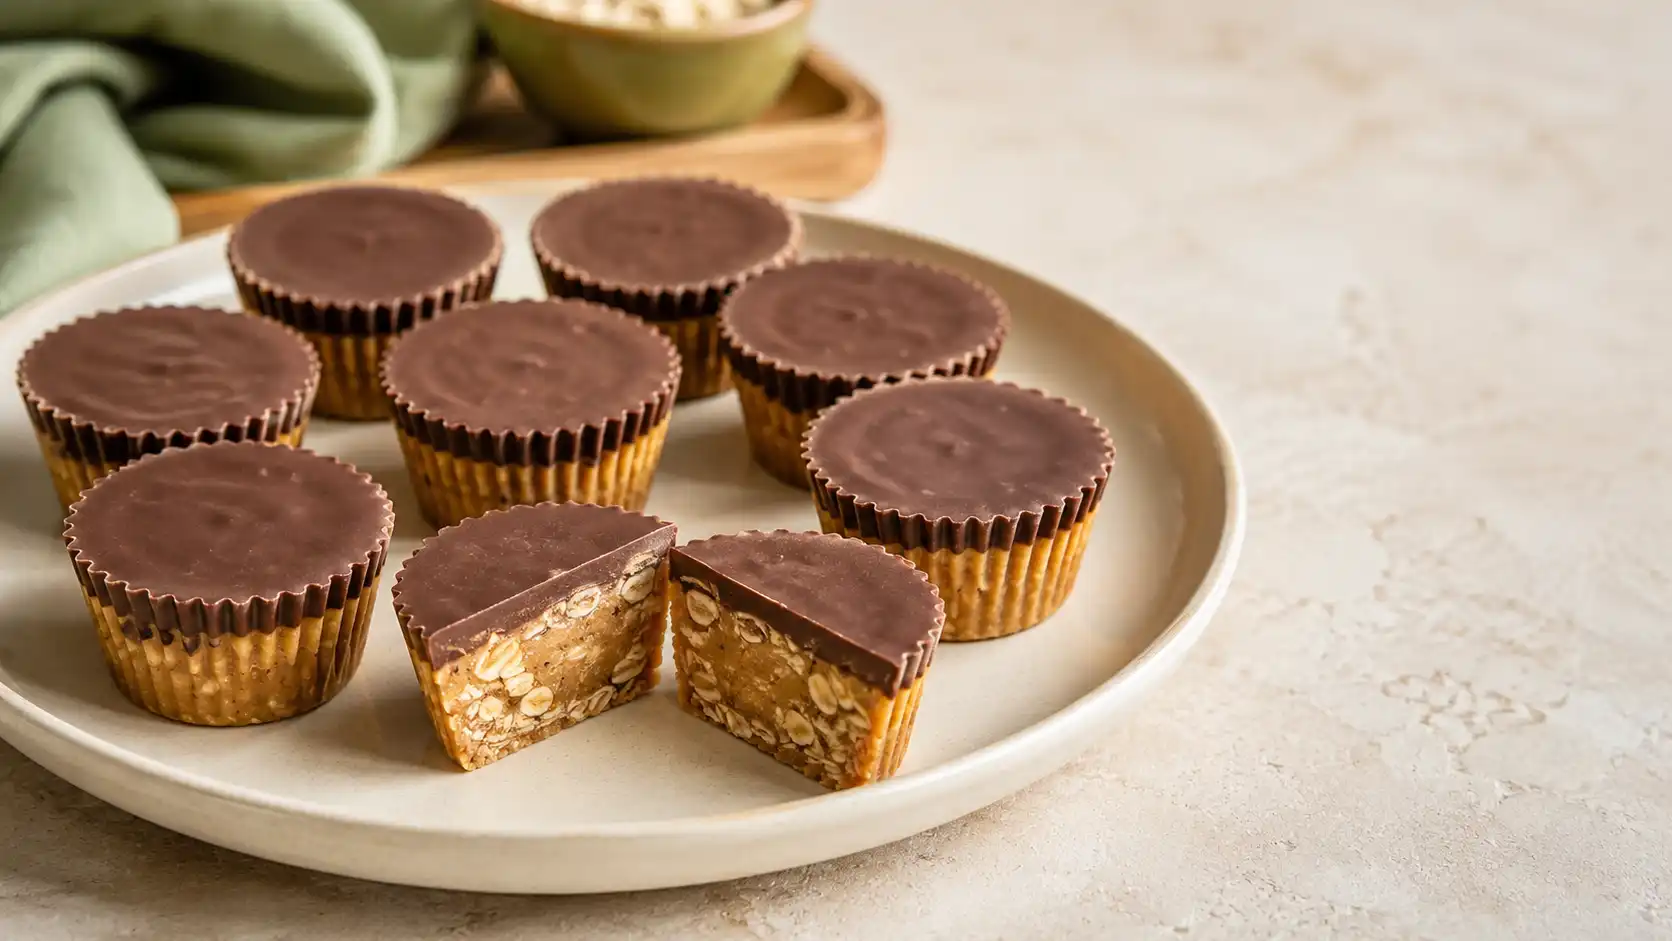
No Bake Peanut Butter Oat Cups With Chocolate
Ingredients
Equipment
Method
- Line all 12 cavities of a standard muffin pan with silicone or paper muffin liners.
- Add 3/4 cup of creamy peanut butter and the honey to a medium mixing bowl. Stir until smooth and evenly combined.
- Add the rolled oats and optional salt. Stir until every oat is evenly coated.
- Let the oat mixture rest for 5 minutes so the oats can begin absorbing moisture.
- Press a spoonful of the mixture between your fingers. It should hold together without crumbling or releasing visible oil.
- Divide the oat mixture evenly among the 12 prepared muffin liners.
- Use the flat bottom of a small measuring cup or glass to press each portion firmly into the bottom of its liner.
- Refrigerate the oat bases for 20 to 30 minutes, or until their surfaces feel firm.
- Place the semisweet chocolate chips and the remaining tablespoon of peanut butter in a microwave-safe bowl. Microwave in 20-second intervals, stirring thoroughly after each interval, until smooth.
- Divide the melted chocolate evenly among the chilled oat bases and spread it into a thin layer.
- Refrigerate for another 30 to 45 minutes, or until the chocolate topping and sides of the cups feel firm.
- Gently peel away the liners and transfer the oat cups to an airtight container. Keep chilled until serving.
Notes
More Budget Snack Ideas
For the same core ingredients in a rolled format, try these peanut butter oat balls.
This Greek yogurt peanut butter dip provides a creamy peanut butter snack with Greek yogurt as its main protein source.
You can also explore these high-protein snacks on a budget when you need ideas with a stronger primary protein source.
Frequently Asked Questions
Can I use quick oats for peanut butter oat cups?
Quick oats can work, but they absorb moisture faster and create a softer, denser base. Add them gradually and stop when the mixture holds together when firmly pressed.
Why are my peanut butter oat cups falling apart?
The base may not contain enough binder, or it may not have been compacted firmly enough. After the five-minute rest, add peanut butter or honey one teaspoon at a time until the mixture holds together.
Can I make peanut butter oat cups without coconut oil?
Yes. This recipe melts the chocolate chips with one tablespoon of creamy peanut butter, so coconut oil is not required.
How long do peanut butter oat cups last?
For the best texture and quality, store the cups in an airtight container in the refrigerator and use them within about seven days.
Can I freeze no bake peanut butter oat cups?
Yes. Freeze them in a single layer until firm, then transfer them to a freezer-safe container. Use them within approximately two months for the best quality.
Final Thoughts
These no bake peanut butter oat cups use a compact oat base and a thin chocolate topping to create a format that is clearly different from rolled energy balls. Pressing the base firmly and chilling it before adding the chocolate are the two most important steps.
Keep the first batch simple so you can see how your usual oats and peanut butter behave. Once the base texture and chill time have been confirmed, you can test maple syrup, different chocolate chips, or a mini muffin version.